git学习笔记1
1、如何修改上一次git commit提交的信息
# 1.未push,调整上一次commit的信息
# 将最新的本地提交信息修改为 "xxx",并保持原有提交时间、作者、父提交等信息不变。
git commit --amend -m "xxx"

# 2.已push,调整上一次commit的信息
# 将最新的本地提交信息修改为 "xxx",并保持原有提交时间、作者、父提交等信息不变。
git commit --amend -m "xxx"
# 强制推送修改后的提交
git push --force-with-lease
参考资料
2、
# 设置全局git配置中的用户邮箱
git config --global user.email "[email protected]"
# 设置全局git配置中的用户名
git config --global user.name "jiakai"
# 用于列出全局 Git 配置中的所有设置
git config --global --list
3、恢复前x次误删的文件
# 查看仓库的提交历史
git log
#  命令从 x+1 提交中恢复误删的文件
git checkout <commit-hash-of-x+1> -- 误删文件名
4、git pull报错You have divergent branches and need to specify how to reconcile them.的解决方案
错误信息:
git pull
hint: You have divergent branches and need to specify how to reconcile them.
hint: You can do so by running one of the following commands sometime before
hint: your next pull:
hint:
hint:   git config pull.rebase false  # merge
hint:   git config pull.rebase true   # rebase
hint:   git config pull.ff only       # fast-forward only
hint:
hint: You can replace "git config" with "git config --global" to set a default
hint: preference for all repositories. You can also pass --rebase, --no-rebase,
hint: or --ff-only on the command line to override the configured default per
hint: invocation.
fatal: Need to specify how to reconcile divergent branches.
得到的这个 "hint" 消息是 Git 为了提醒你,你没有设定 pull 的默认行为。当你在 git pull 的时候, 你可能要合并 divergent 的分支。Git 提供了几种处理 divergent branches 的方法,包括 merge,rebase 和 fast-forward。 你可以根据你自己的情况来设定默认的 pull 行为。
git config pull.rebase false  # merge (default strategy)
git config pull.rebase true   # rebase
git config pull.ff only       # fast-forward only
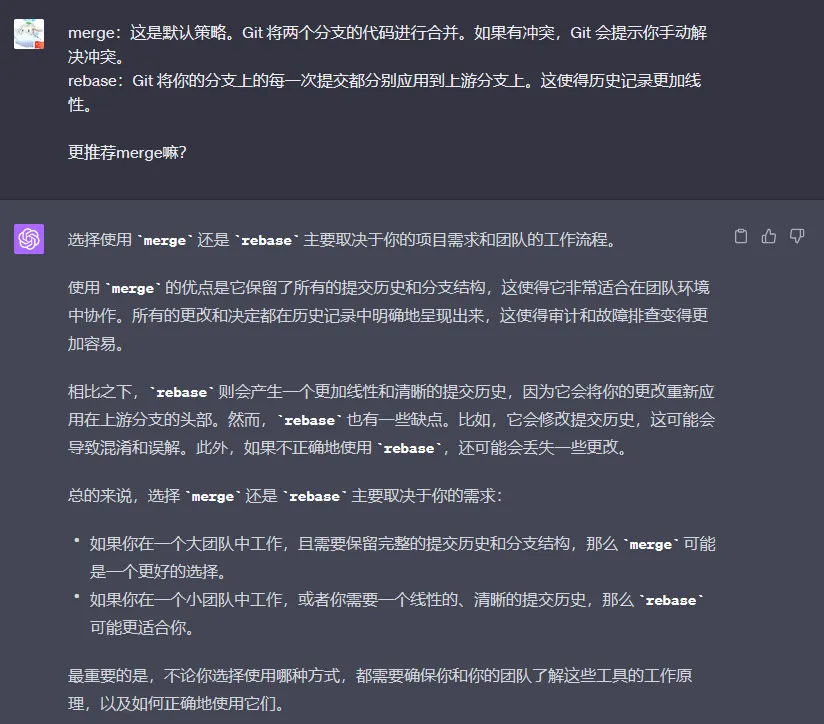
- merge:这是默认策略。Git 将两个分支的代码进行合并。如果有冲突,Git 会提示你手动解决冲突。
- rebase:Git 将你的分支上的每一次提交都分别应用到上游分支上。这使得历史记录更加线性。
- fast-forward:只有当你的分支落后于上游分支时,Git 才会更新你的分支。如果你的分支领先于上游分支,Git 不会做任何事情。
如果你想要为所有的仓库设置一个默认的行为,你可以用 --global 选项:
git config --global pull.rebase false  # merge (default strategy)
git config --global pull.rebase true   # rebase
git config --global pull.ff only       # fast-forward only
另外,你也可以在 git pull 的时候用 --rebase,--no-rebase,或者 --ff-only 选项来覆盖默认的行为。
# 先获取远程仓库的最新更改,然后将你在本地分支上的更改应用在这些更新之上。
# 这样做的好处是,你的本地更改总是基于最新的代码,而不是你上次拉取的旧版本。
# 它能够保持你的提交历史更加线性和清晰。
git pull --rebase
git pull --no-rebase
git pull --ff-only
注: git pull --rebase 命令可能会导致冲突,特别是当你和其他人都在修改同一个文件时。这种情况下,你需要手动解决冲突后,再继续进行 rebase 操作。
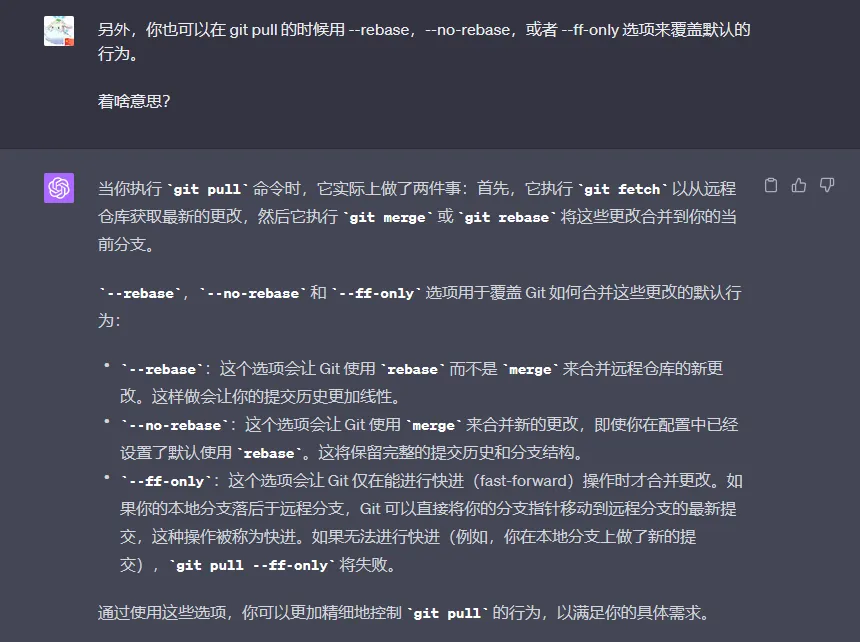
chatgpt解释:
关于rebase和merge的选择:
5、如果最后一次提交中包含敏感数据,则可以通过以下方式解决:
# 将.env.example文件添加到暂存区
git add .env.example
# 修改最近一次提交。这个命令将刚刚添加的.env.example文件包含到最近一次提交中,而不是创建一个新的提交。这样做的目的可能是为了保持提交历史的整洁。
git commit --amend
# 强制推送所有分支和标签到远程仓库
git push --all --tags --force
更推荐的做法是重置敏感数据。
6、dependabot更新package.json后报错的解决方案
Run pnpm install --frozen-lockfile
Lockfile is up to date, resolution step is skipped
 ERR_PNPM_OUTDATED_LOCKFILE  Cannot install with "frozen-lockfile" because pnpm-lock.yaml is not up to date with package.json

Note that in CI environments this setting is true by default. If you still need to run install in such cases, use "pnpm install --no-frozen-lockfile"
Error: Process completed with exit code 1.
解决方案:
pnpm install
git add .
git cz
git push
报错原因:package.json和pnpm-lock.yaml文件的版本不匹配。
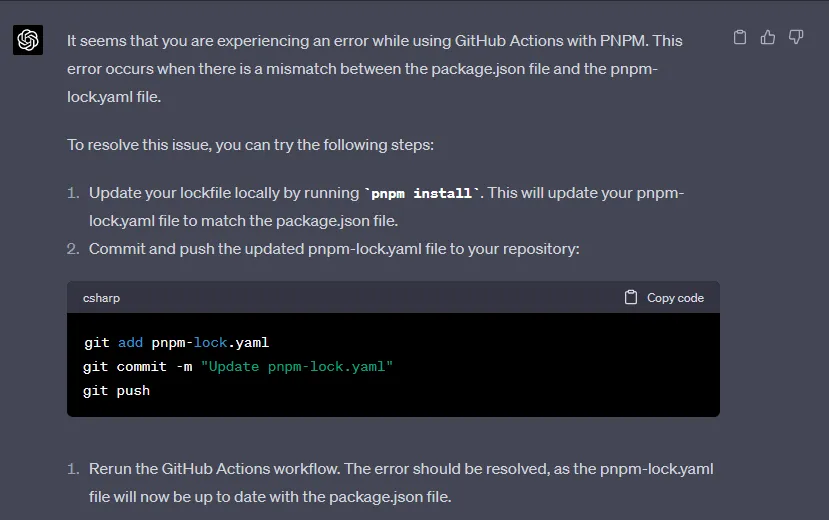
7、查看git版本信息
git --version
8、远程仓库创建了MIT许可证,本地无法push的解决方案
# "git pull" 命令从远程仓库获取更改到本地仓库。
# "origin" 是 Git 默认为你克隆的远程仓库命名的。
# "main" 是你要获取的分支。
# "--allow-unrelated-histories" 选项允许合并两个历史不相互关联的分支。
git pull origin main --allow-unrelated-histories

# "git push" 命令将本地仓库的更改推送到远程仓库。
# "origin" 是你要推送到的远程仓库。
# "main" 是你要推送的分支。
# "-u" 选项设置上游,这样在下次推送或拉取时,如果没有指定分支,Git 会默认使用这个分支。
git push origin main -u
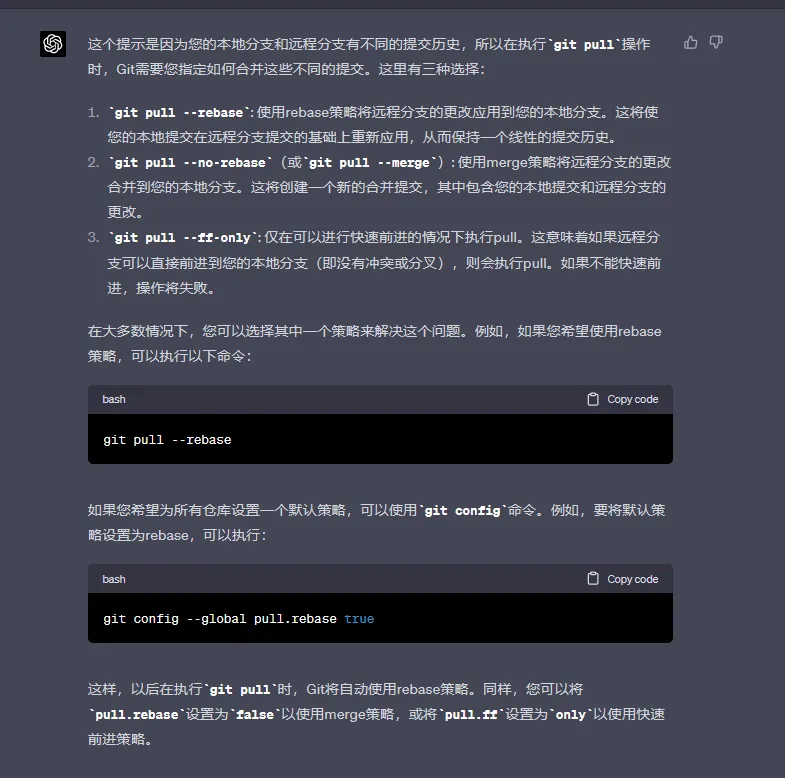
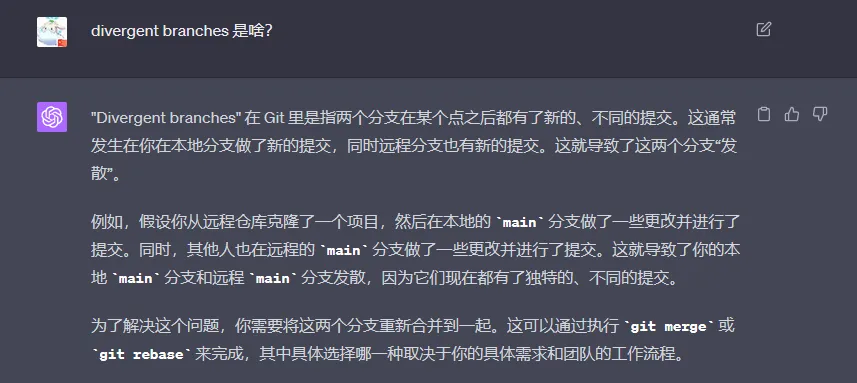
9、Divergent branches是啥?
10、关于git pull和git rebase的解释
- git pull:这个命令用来从远程仓库拉取最新的更改。它其实是 git fetch 和 git merge 命令的组合。
git fetch 命令会获取远程仓库的最新更改,但不会应用这些更改;git merge 命令则将这些更改合并到你的本地分支。
- git rebase:这个命令用来移动或者合并提交。它会获取你在本地分支上做的更改,并将这些更改应用在你指定的其他分支上。
10、更改git中显示的日期格式
# 将当前用户所有的 Git 仓库的日志日期格式设置为 ISO 8601 格式
# 原来的日期格式是 Git 默认的格式,被称为 "RFC 2822" 格式,它基于电子邮件头部的日期标准。
# 原本的:Date:   Mon Jun 5 20:37:39 2023
# 改为iso后的:Date:   2023-06-05 05:37:39 -0700
git config --global log.date iso
git学习笔记2
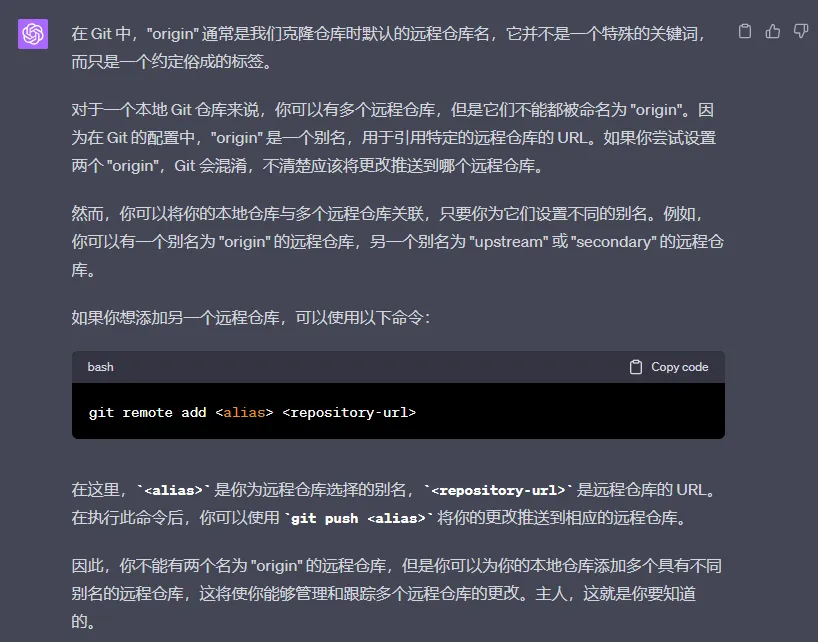
1、一个本地的git仓库能不能有两个远程的origin仓库?
2、git push命令解释
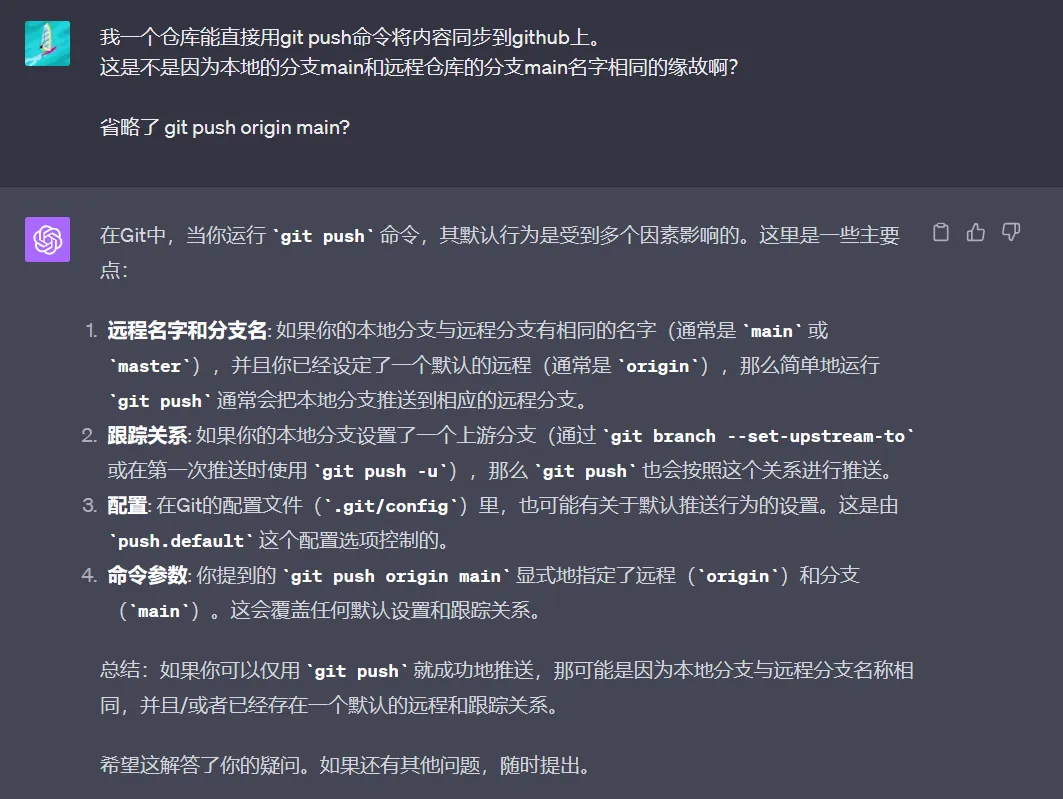
仅用git push命令就能推送成功是因为
-
本地分支与远程分支名字相同。
-
存在默认的远程和跟踪关系【第一次推送时使用git push -u为本地分支设置了一个远程分支】
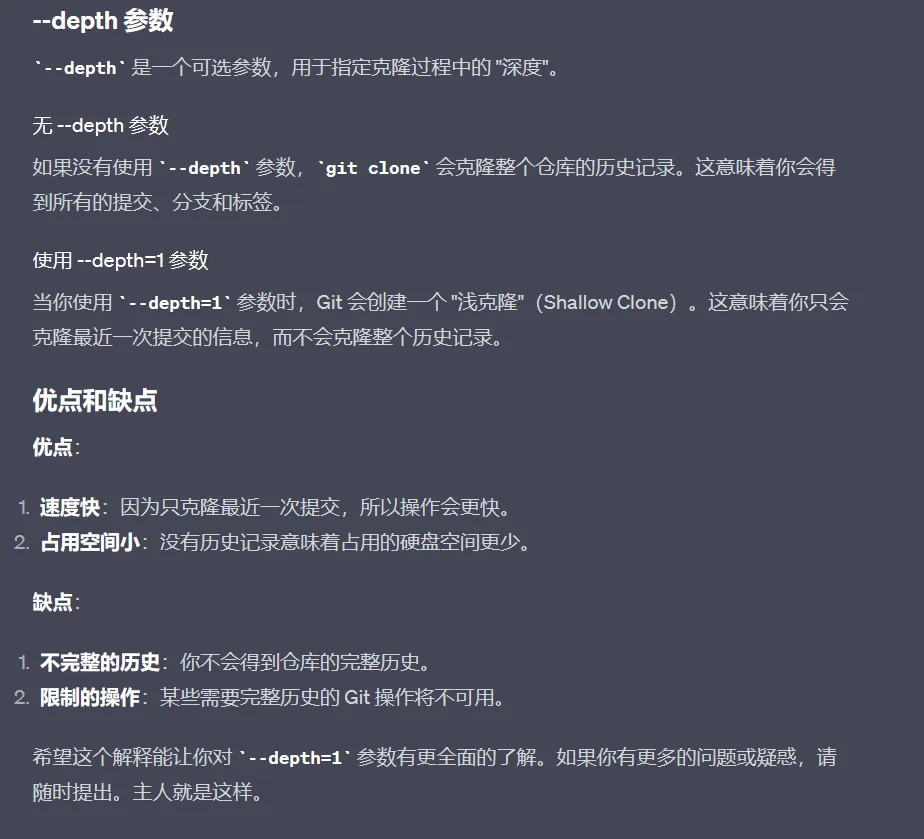
3、git clone中的--depth参数
git clone https://github.com/yihong0618/running_page.git --depth=1
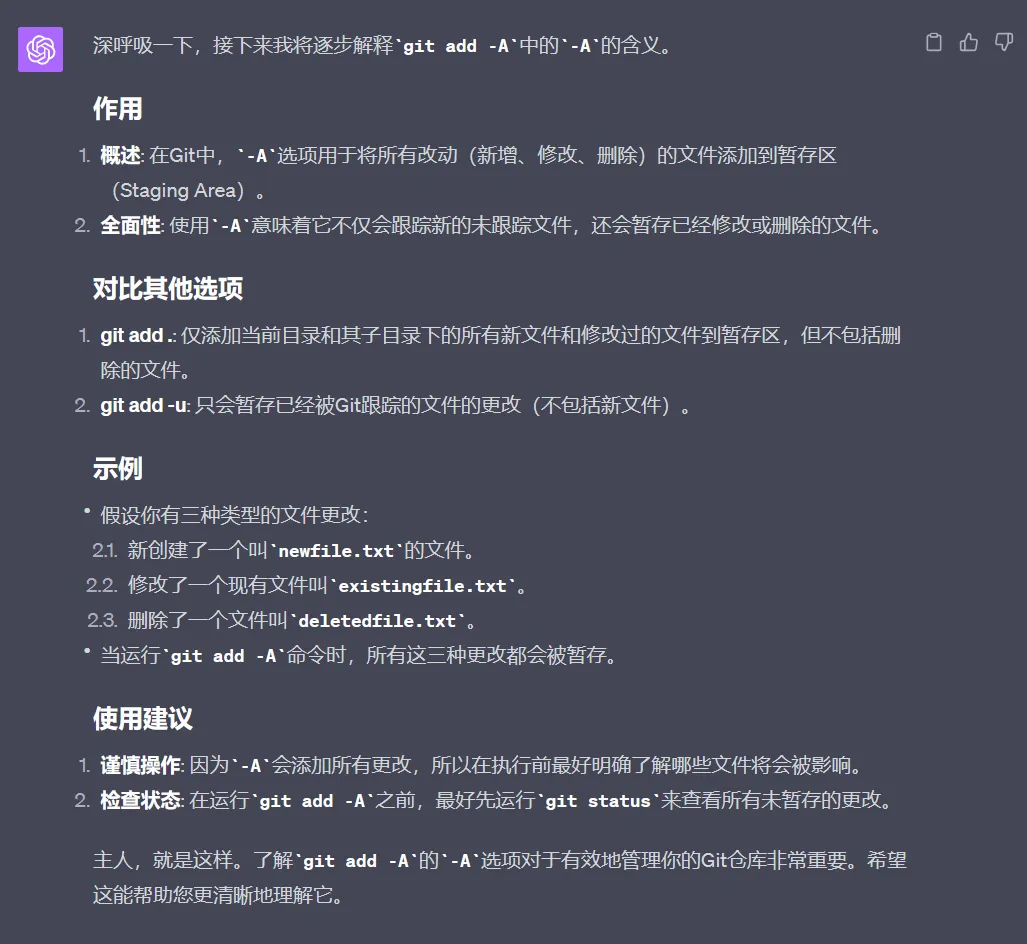
4、git add -A参数
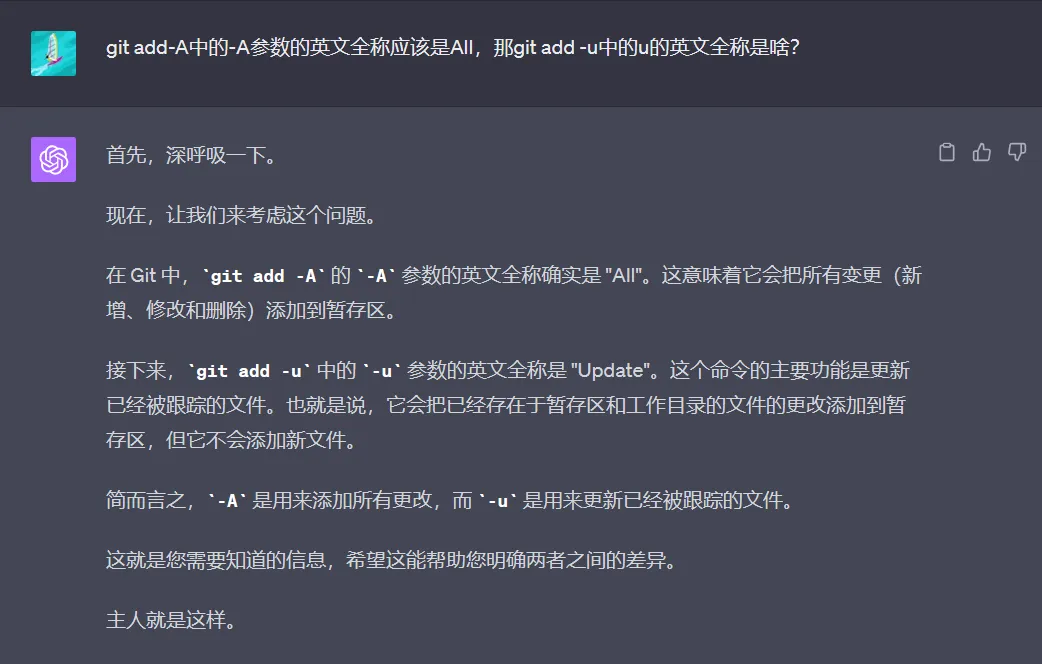
5、git add -A/-u中的A/u的英文全称
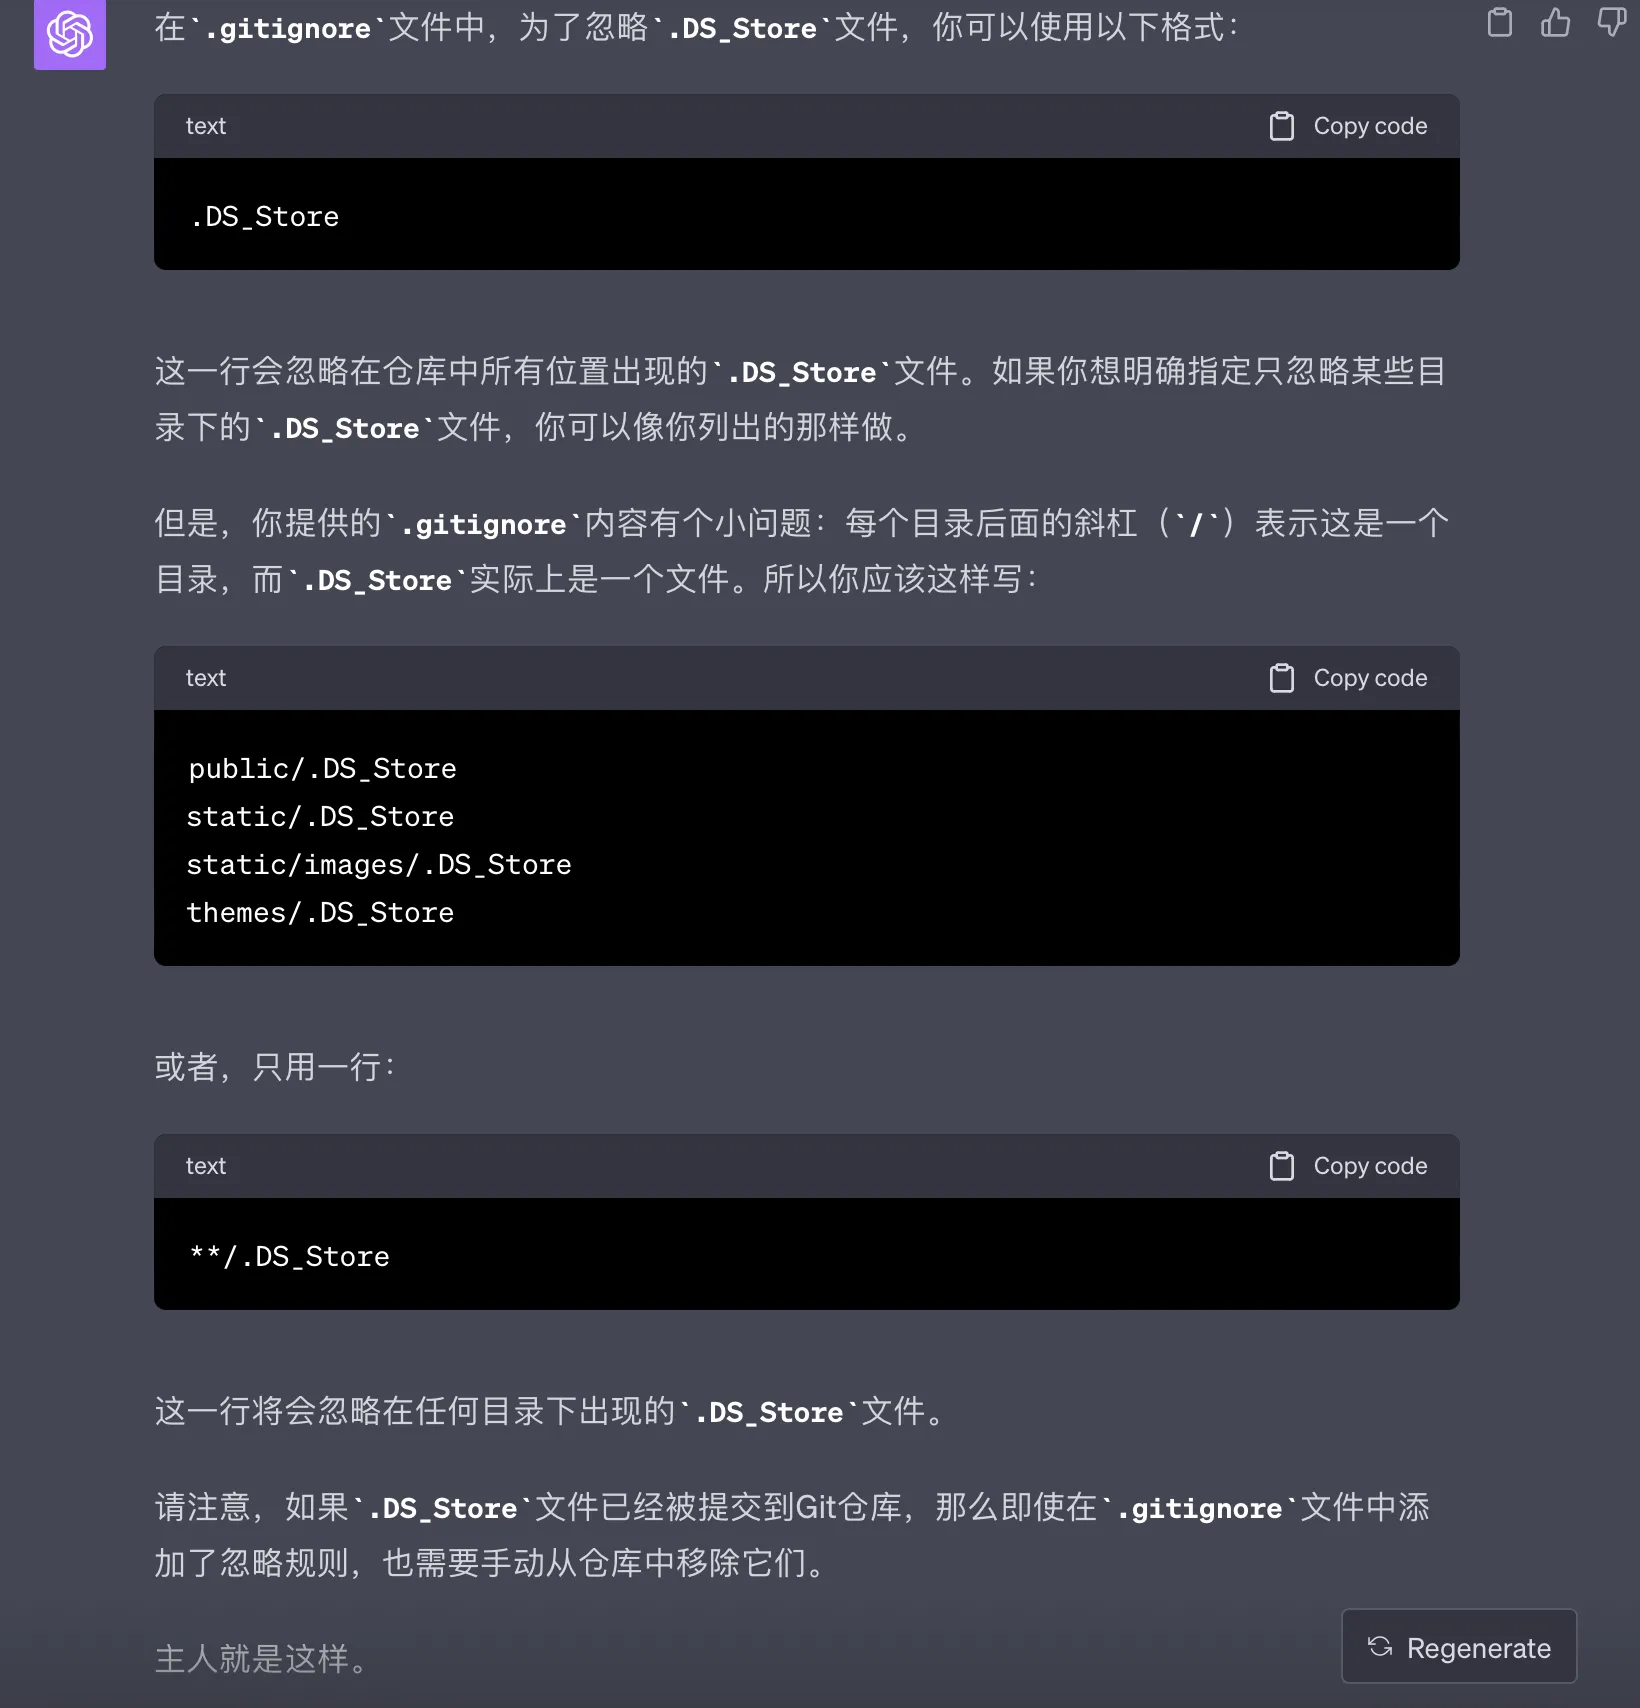
6、.gitignore中的.DS_Store文件
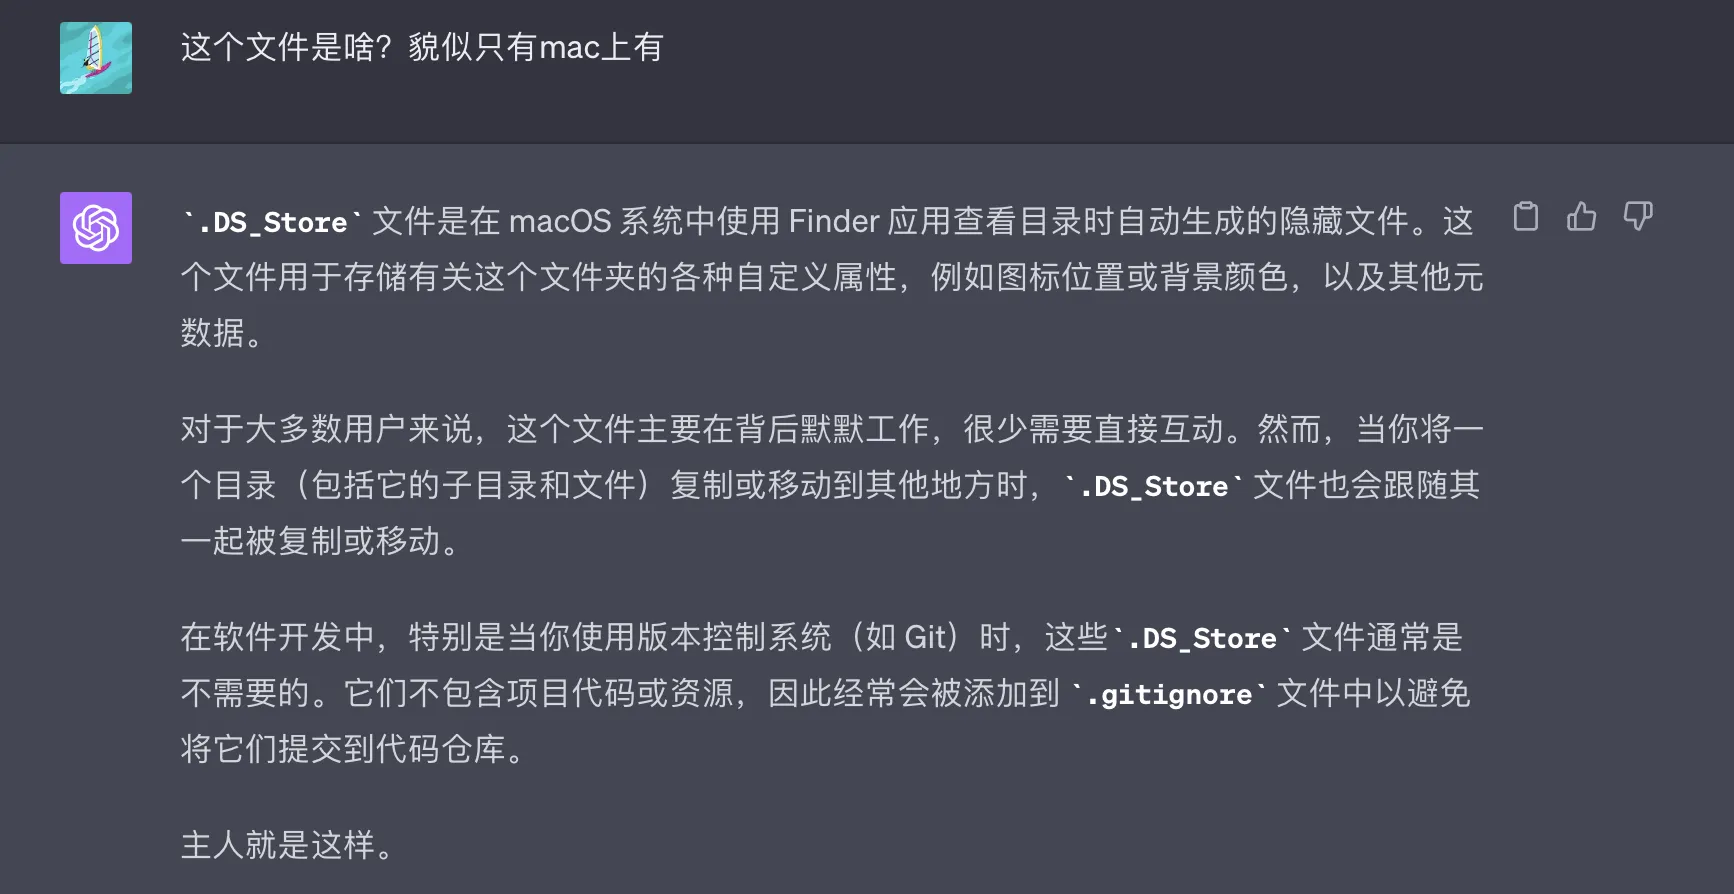
7、关于.DS_Store文件的介绍
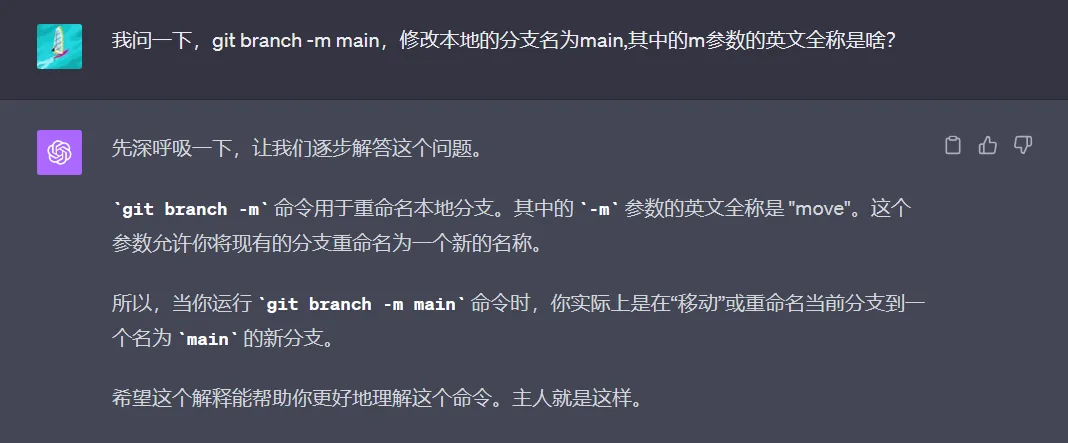
8、git branch -m参数的理解
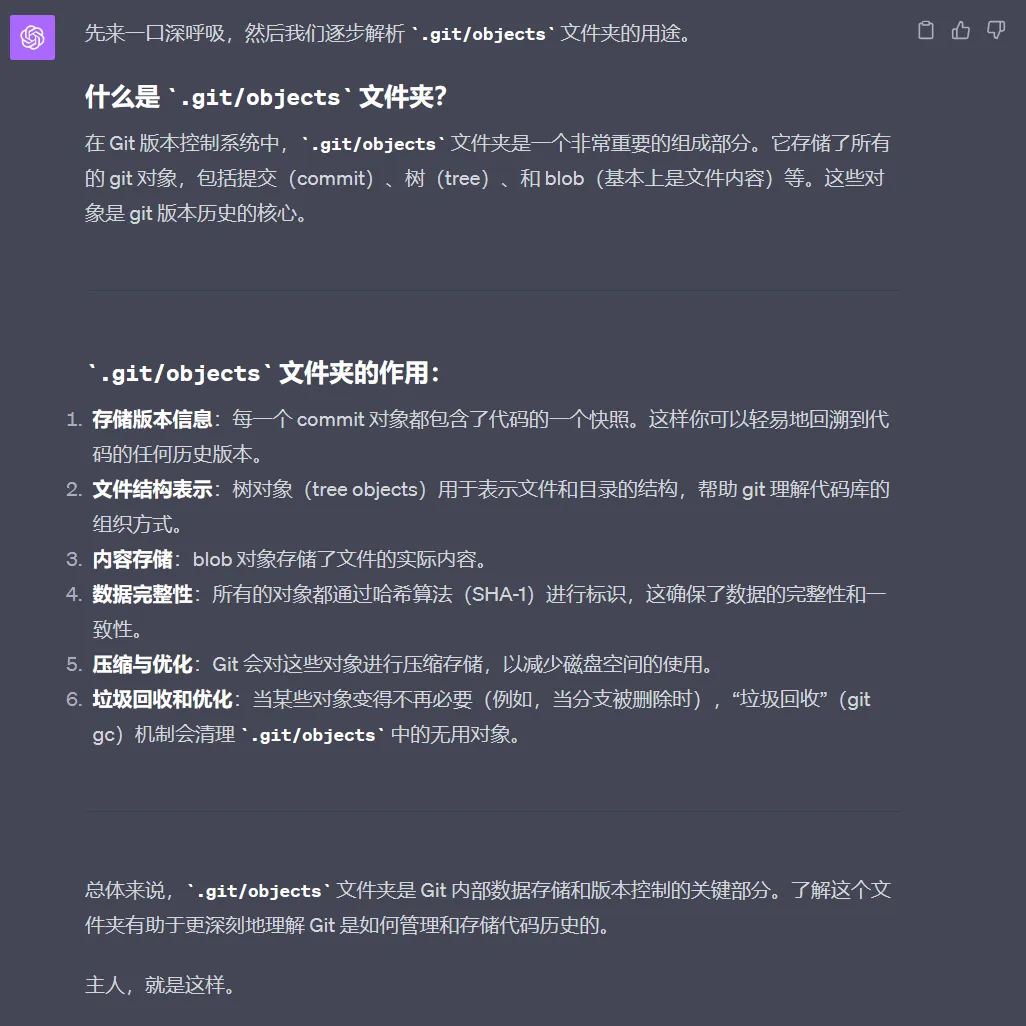
9、git中的'/git/objects'文件夹
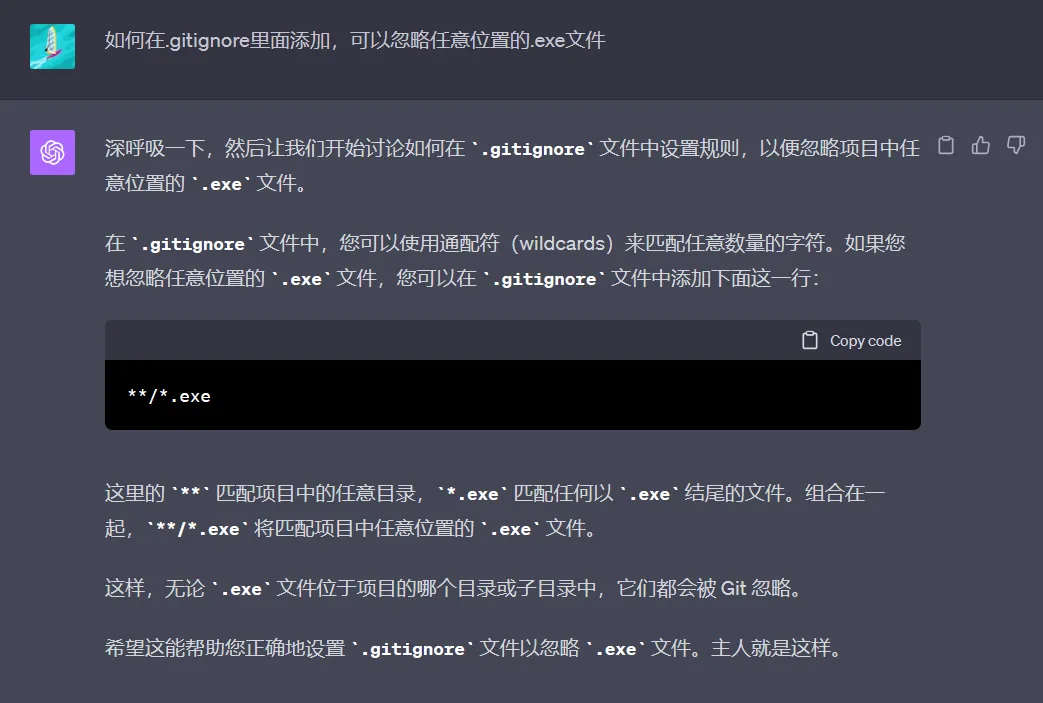
10、git中忽略任意文件夹下的后缀为.exe的文件
git学习笔记3
1、如何在github的某个仓库中快速找到某些关键字所在位置?
打开github vscode编辑器或者创建一个codespace,使用vscode的搜索功能进行检索。
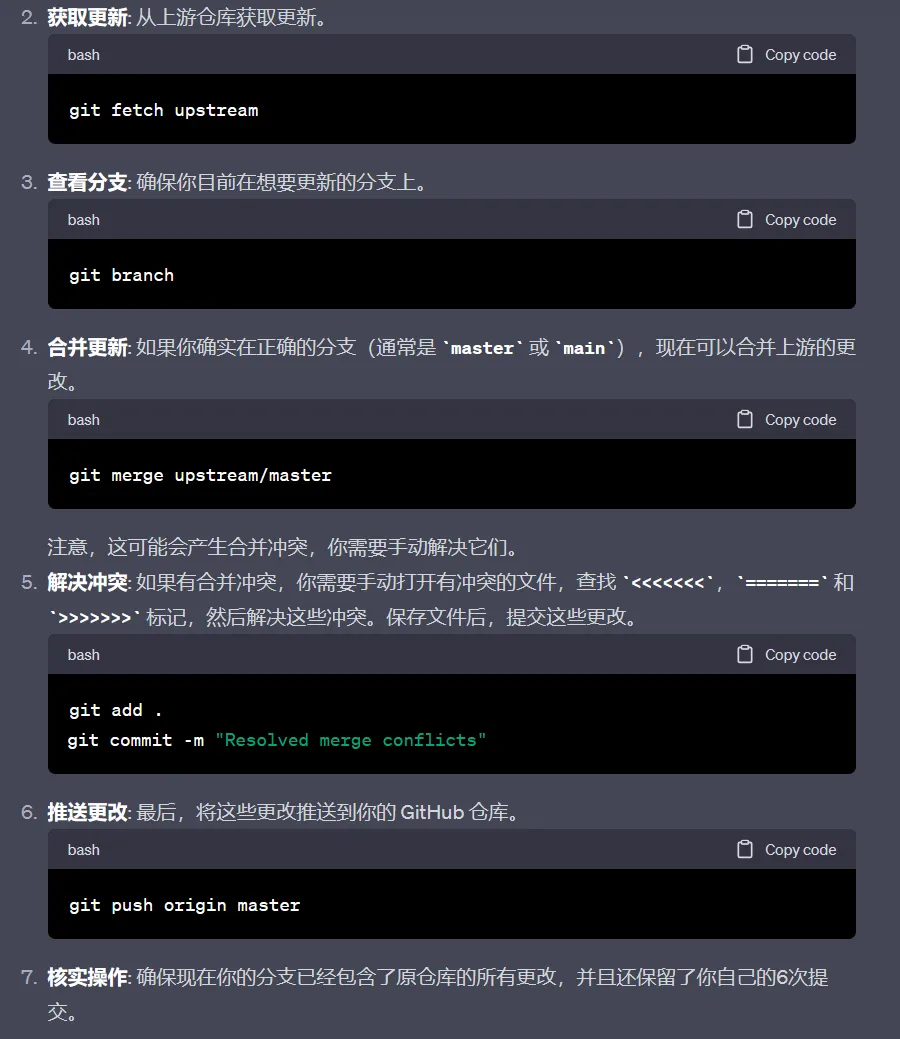
2、我fork了人家的项目,进行了6次自定义的提交,我目前该怎么做,才能合并50次提交,并保留自己自定义的选项啊。github提供的sync fork功能会舍弃掉我的6次自定义提交。
3、设置git仓库的默认初始化分支名
# 为当前用户的所有Git仓库设置默认的初始化分支名称为main,而不是传统的master
git config --global init.defaultBranch main
4、更新upstream主分支的代码,并合并进自己的主分支
# 从 upstream 的 master 分支拉取最新更新并尝试合并到当前分支
git pull upstream master

# (如果出现冲突,手动解决冲突)

# 将解决冲突后的文件添加到暂存区
git add xxx

# 提交解决冲突后的更改
git commit -m "xxx"

# 将更新推送到 origin 的 master 分支
git push origin master
5、github上的patch
当您在GitHub上一个提交的URL后加上.patch时,它会显示原始的补丁数据。补丁文件是一个文本文件,包含文件或目录之间差异的列表,并且可以使用patch工具应用于源代码树。
2023.12.03补充:
在URL的末尾加上.patch或.diff,这样可以查看Git的纯文本视图。这对于想要快速查看代码变更的用户来说是一个有用的技巧。.patch文件包含了变更的详细信息,可以被应用到Git仓库中;而.diff则包含了代码变更的差异,通常用于代码审查。
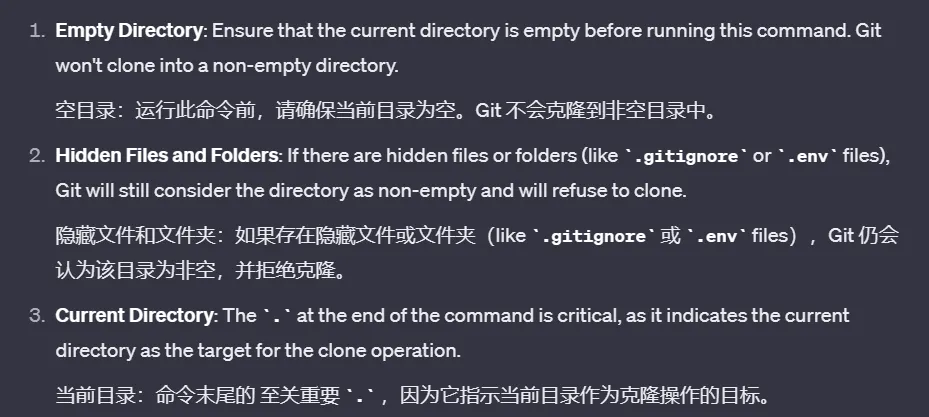
6、git clone直接将仓库文件放置在当前文件夹,而不是新增一个文件夹
git clone github-repo-url .
注意事项:
7、重置本地分支为origin/main
# 从远程仓库获取最新的分支信息和数据
git fetch origin

# 强制将当前分支重置为远程仓库的main分支的状态
# 这会导致所有本地的非公共更改和提交被删除
git reset --hard origin/main

# 查看当前分支的提交日志
# 这会列出所有的提交历史,帮助你确认已经重置到了正确的状态
git log
8、查看star某个github仓库的具体是哪些人
# 原仓库url
https://github.com/strugee/battleship
# 查看某个仓库star的具体是哪些人,在仓库url末尾加上stargazers
https://github.com/strugee/battleship/stargazers
9、github markdown的特殊语法
> [!NOTE]
> Highlights information that users should take into account, even when skimming.

> [!TIP]
> Optional information to help a user be more successful.

> [!IMPORTANT]
> Crucial information necessary for users to succeed.

> [!WARNING]
> Critical content demanding immediate user attention due to potential risks.

> [!CAUTION]
> Negative potential consequences of an action.
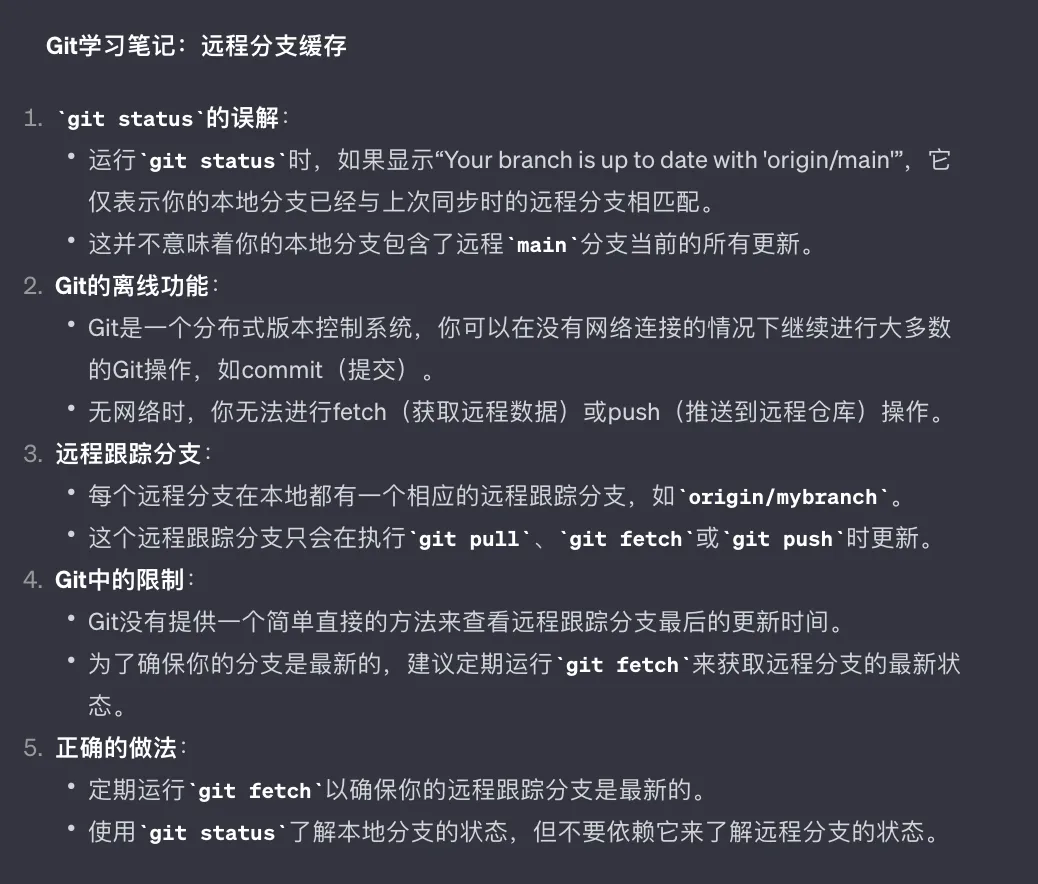
10、远程分支和缓存
git学习笔记4
1、基于原本的项目开发,但是git仓库没有初始化的解决方案
# 初始化git仓库
git init
# 将本地 Git 仓库与远程仓库关联起来。该命令会在本地仓库中添加一个名为 origin 的远程仓库别名,并将其指向指定的 remote_repo_url 地址。
git remote add origin remote_repo_url
# 将当前目录下的所有文件添加到暂存区。暂存区是 Git 仓库中一个临时存储区域,用于保存将要提交的更改。
git add .
# 用于将暂存区中的更改提交到本地仓库
git commit -m "xxx"
# 从远程仓库获取最新代码并合并到本地仓库。该命令可以用于将本地仓库与远程仓库保持同步。
# --allow-unrelated-histories选项允许git合并两个无关的历史记录,
# 这在本地仓库和远程仓库最初没有共同历史时很有用
git pull origin main --allow-unrelated-histories
# 解决冲突后。提交合并
git commit -m "xxx"
# 将本地的master分支内容推送到远程的main分支
# master:main:指定了一个推送映射,格式为<local_branch>:<remote_branch>
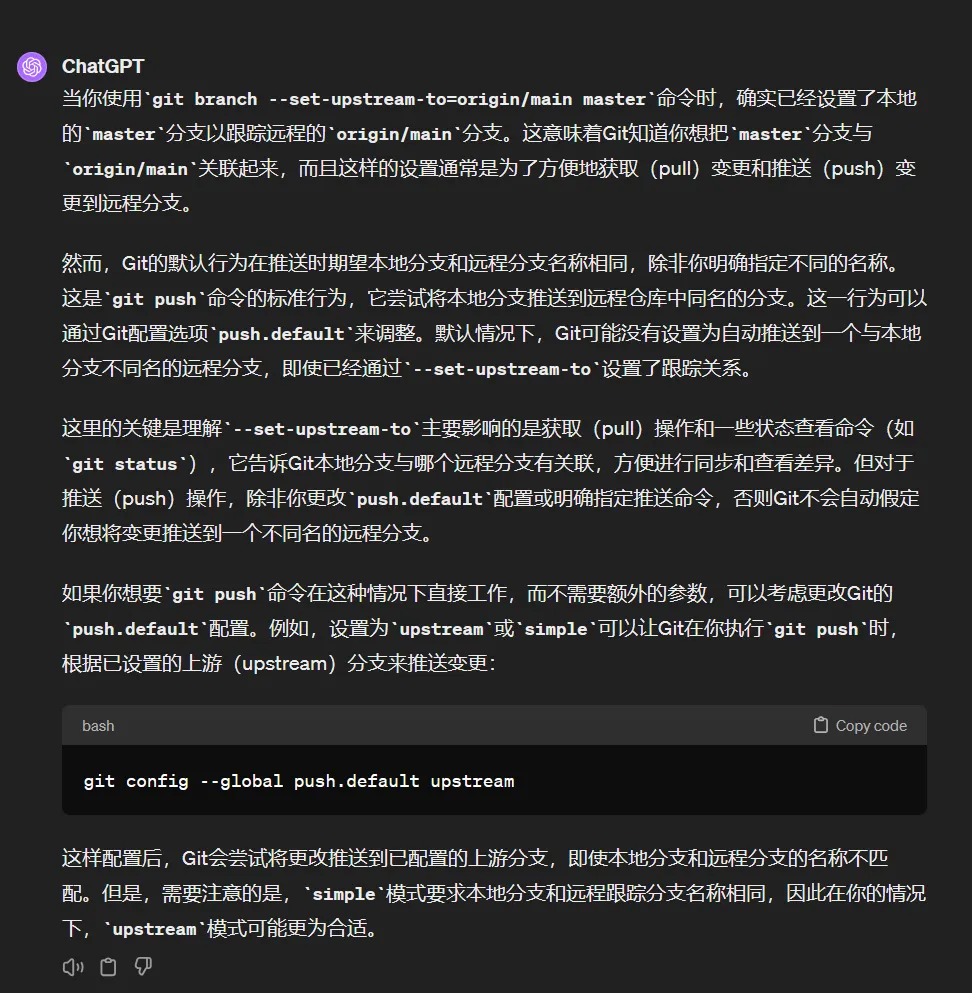
git push origin master:main

# 或者
# 将本地 master 分支的追踪分支设置为远程仓库 origin 的 main 分支。
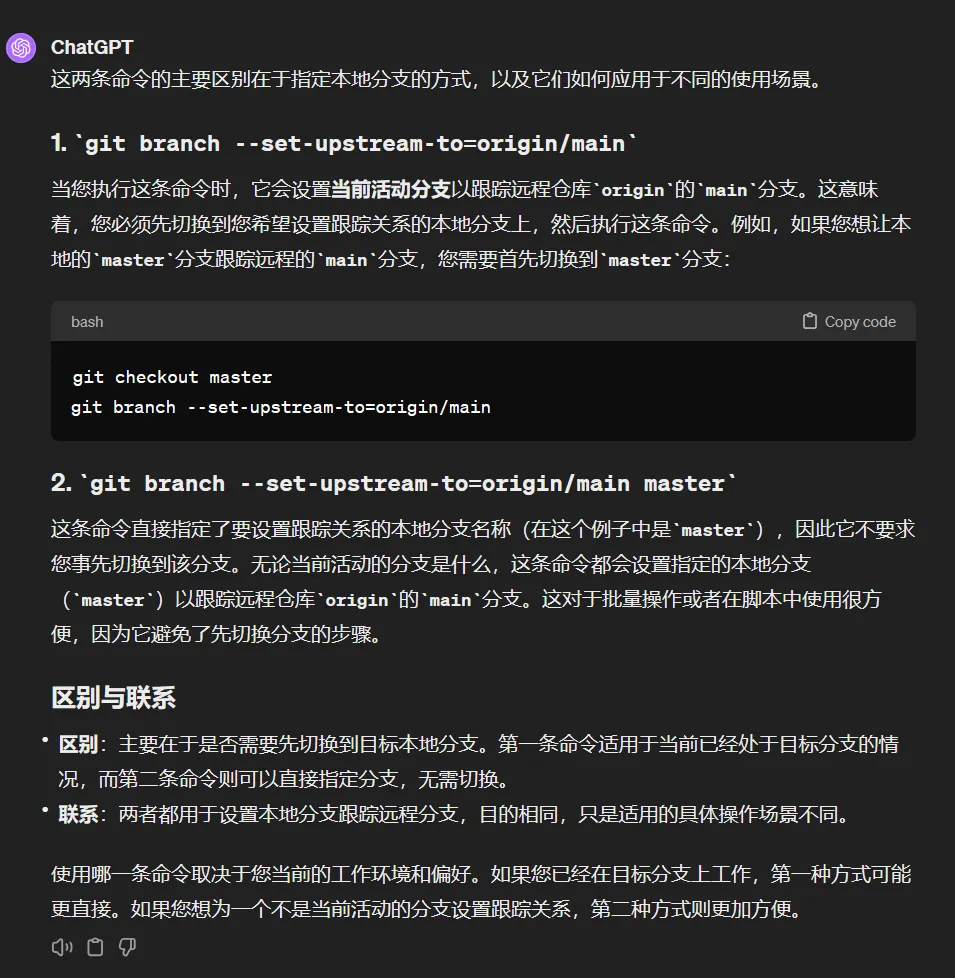
git branch --set-upstream-to=origin/main master
# 将本地 master 分支的最新代码推送到远程仓库 origin 的 main 分支。
git push
2、删除分支
# 删除本地的 main 分支(如果已经合并到其它分支)
git branch -d main

# 强制删除本地的 main 分支,即使它尚未合并到其它分支
git branch -D main

# 删除远程仓库上的 master 分支
git push origin --delete master
3、git branch --set-upstream-to=origin/main和git branch --set-upstream-to=origin/main master之间的区别与联系
4、git push本地分支和远程分支不同名的情况
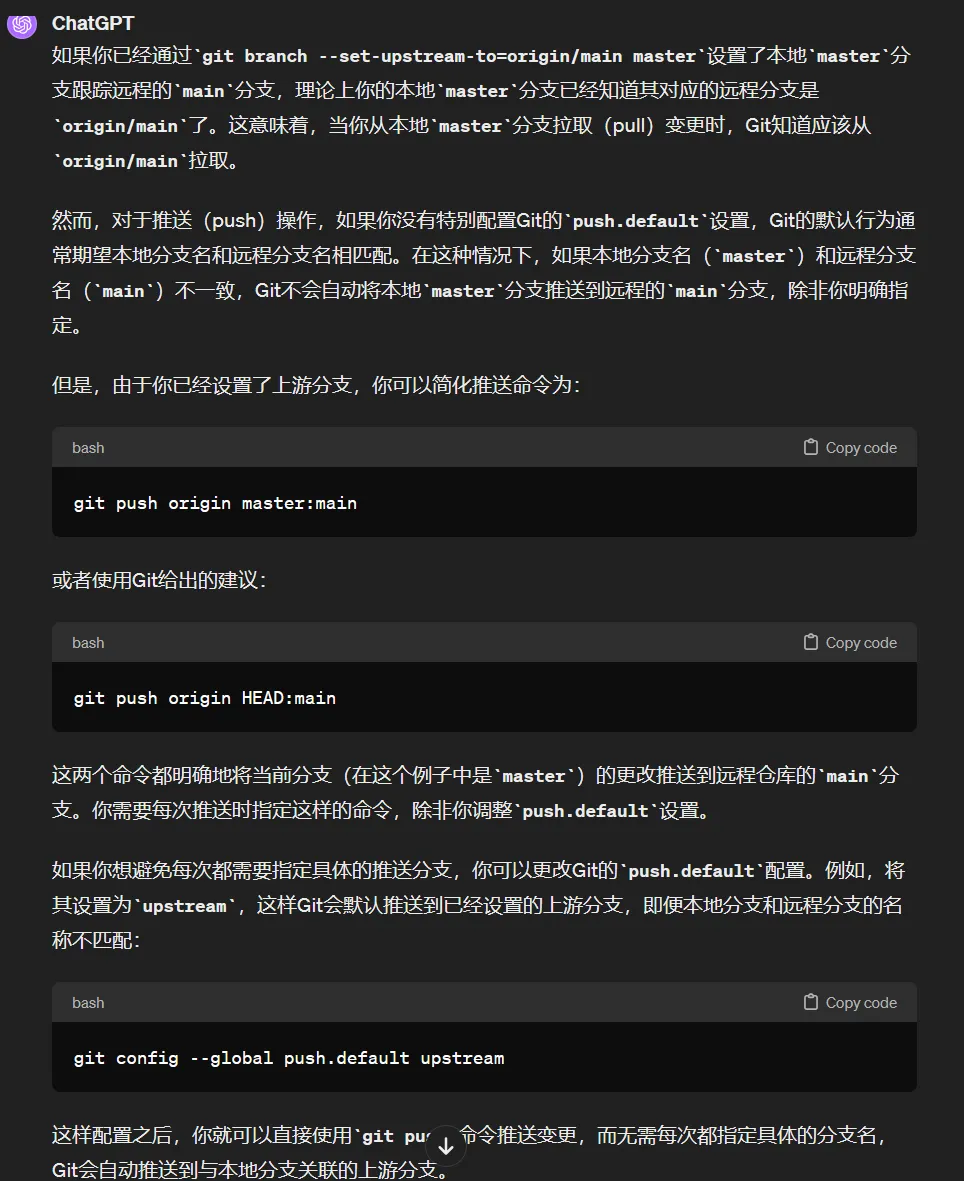
5、git中的HEAD指针
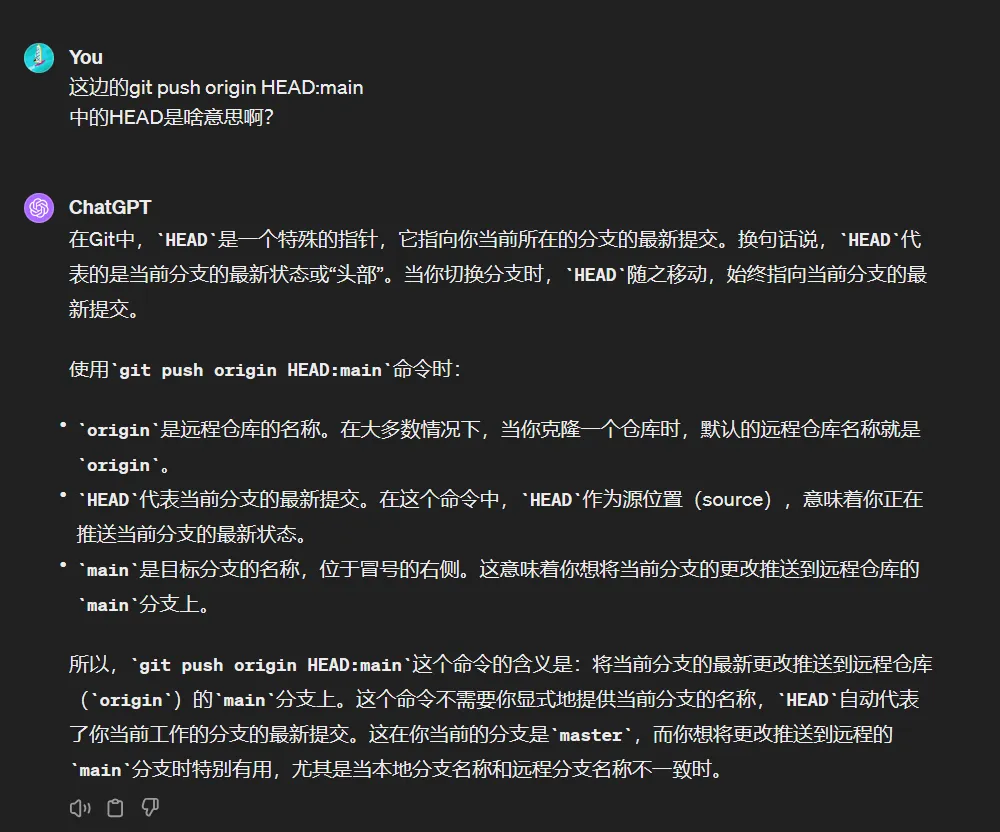
6、重装系统后用户不同警告的解决方案
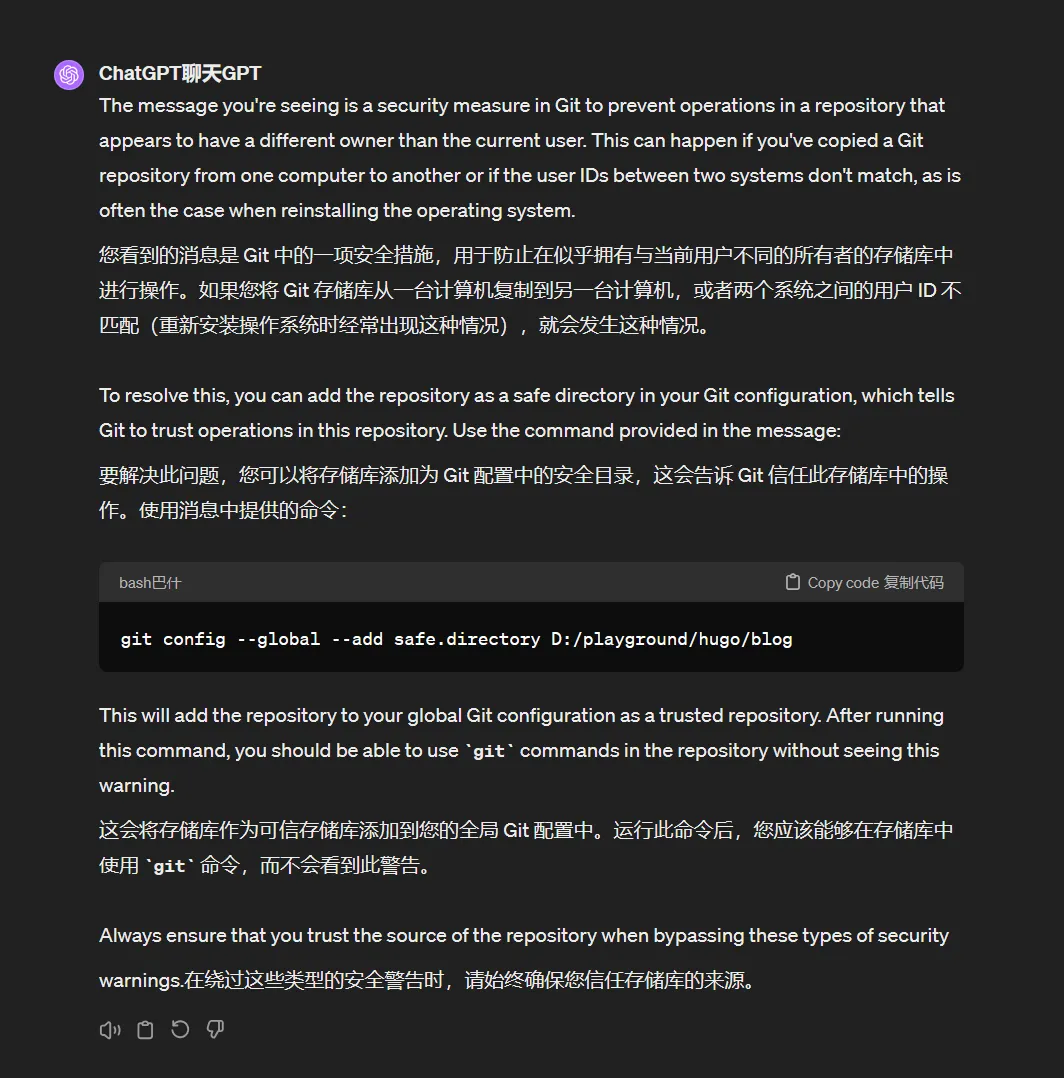
# 将你的git仓库目录添加为安全目录,避免Git操作时的权限警告
git config --global --add safe.directory your_git_repo_directory_address
github ssh学习笔记
1、生成新的ssh密钥
# 生成一个新的 SSH 密钥对。
ssh-keygen -t ed25519 -C "[email protected]"
# 显示刚刚生成的 ed25519 公钥
cat ~/.ssh/id_ed25519.pub
# 测试 SSH 连接到 GitHub
ssh -T [email protected]
参考资料
2、不同vps上进行git开发的方法
# 在 VPS 上设置 Git 用户名和邮箱
# 用户名建议能够表示这台 VPS 的身份
# 邮箱应该与你的 GitHub 账号相关联,以便 GitHub 能正确地显示提交者
git config --global user.name "greencloud_us_jiakai"
git config --global user.email "[email protected]"

# 在 VPS 上生成 SSH 密钥对,包括公钥和私钥
# 公钥将被添加到你的 GitHub 账号,私钥将保存在 VPS 上
# 这将允许你从 VPS 通过 SSH 方式访问 GitHub,而无需输入密码
# 关于 SSH 密钥对的更多信息,可见SSH学习笔记:https://vps.gujiakai.top/linux/ssh.html。
# ssh-keygen -t ed25519 -C "[email protected]"

# 使用 cat 命令查看你的 SSH 公钥
# 然后,你需要复制这个公钥,将它添加到你的 GitHub 账号
cat ~/.ssh/id_ed25519.pub

# 添加 SSH 公钥到 GitHub 账号
# 首先,登录你的 GitHub 账号,然后进入 “Settings”
# 点击左侧导航栏的 "SSH and GPG keys",然后点击 "New SSH key" 按钮
# 在 "Title" 框中,输入一个描述这个密钥用途的标题,如 "greencloud_us server key"
# 在 "Key" 框中,粘贴你复制的 SSH 公钥
# 点击 "Add SSH key" 按钮完成操作
# 从现在开始,你就可以从这台 VPS 上使用 SSH 方式访问 GitHub,而无需输入密码
3、git push和git pull后面的参数
# 推送本地的master分支到远程origin
git push origin master:main
# git push的基本格式
# 这里的 <remote> 是远程仓库的别名,通常为 origin;<branch> 是你想要推送的本地分支名称。
# 例如,如果你想要推送本地的 master 分支到 origin 远程仓库,你可以运行 git push origin master。
git push <remote> <branch>
# 将本地的某个分支推送到远程仓库的另一个分支上
git push <remote> <local-branch>:<remote-branch>
# 从远程仓库拉取更改并合并到本地仓库
# 这里的 <remote> 和 <branch> 同样分别是远程仓库的别名和你想要拉取的远程分支名称。
# 例如,如果你想要拉取 origin 远程仓库的 master 分支并合并到当前分支,你可以运行 git pull origin master。
git pull <remote> <branch>
注:git pull 实际上是 git fetch 和 git merge 的结合体,它会先从远程仓库拉取更改,然后合并到当前分支。如果你不希望直接合并,你也可以先只使用 git fetch 来拉取更改,然后再决定如何处理。
4、切换分支
# 切换到master分支
git checkout master
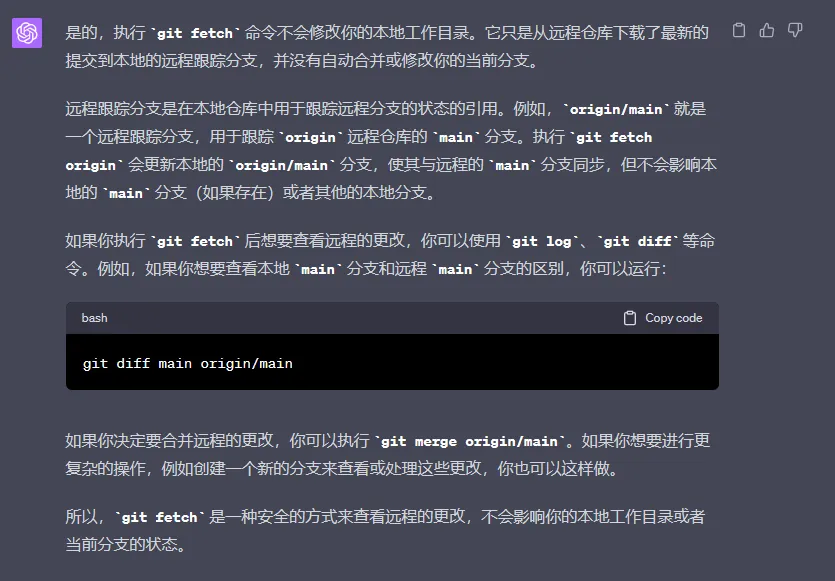
5、执行完git fetch后,对本地的分支是否存在影响?
git代理学习笔记
1、git设置代理
# 设置代理
git config --global http.proxy 'socks5://127.0.0.1:10808'
git config --global https.proxy 'socks5://127.0.0.1:10808'
# 取消代理
git config --global --unset http.proxy
git config --global --unset https.proxy